Birthday Wishes Card

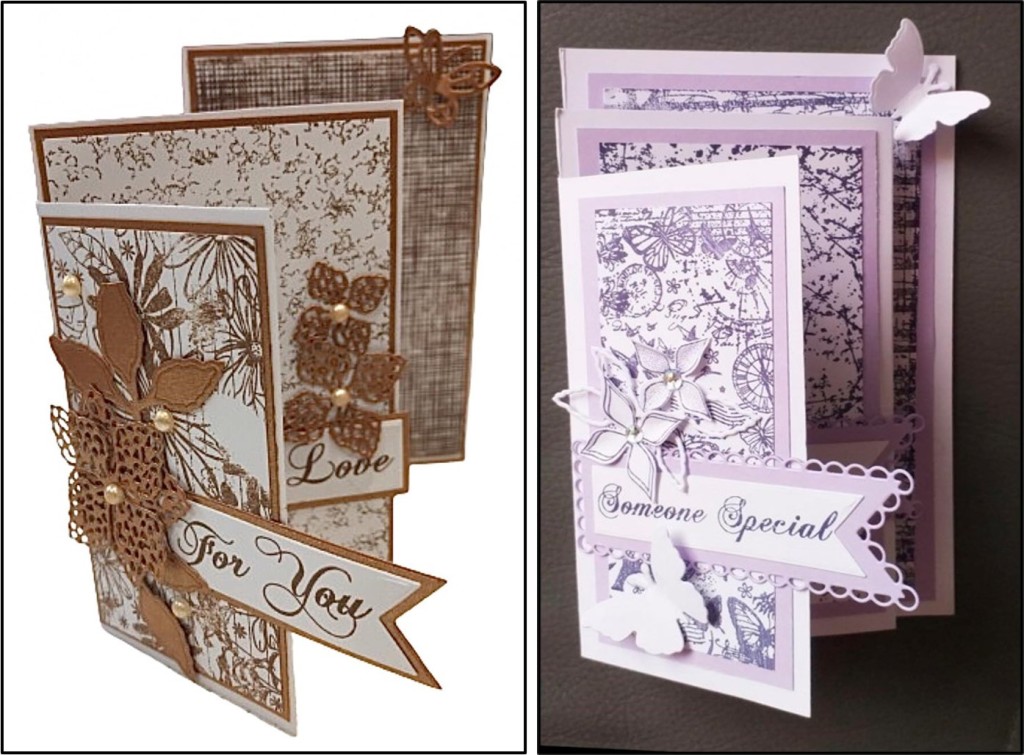
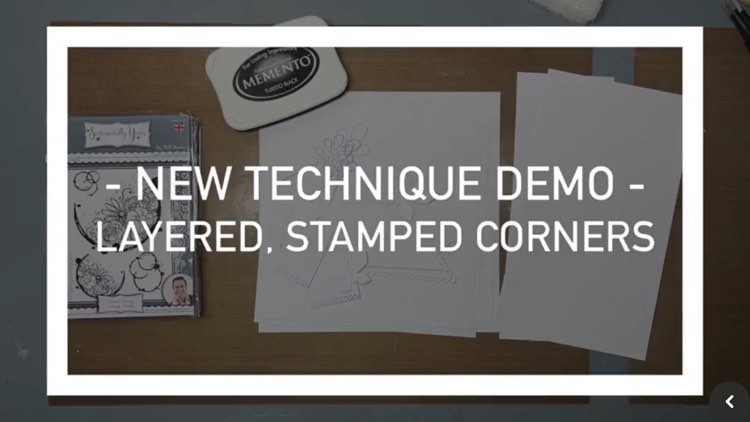
Welcome to a new week and of course as it’s Monday it means that Phill will be live on Facebook and YouTube this evening at 7pm (BST). What will he be wow’ing us with this evening? New products? New techniques? What we are guaranteed of though, is a good laugh and friendly banter. See you there to join in the fun!

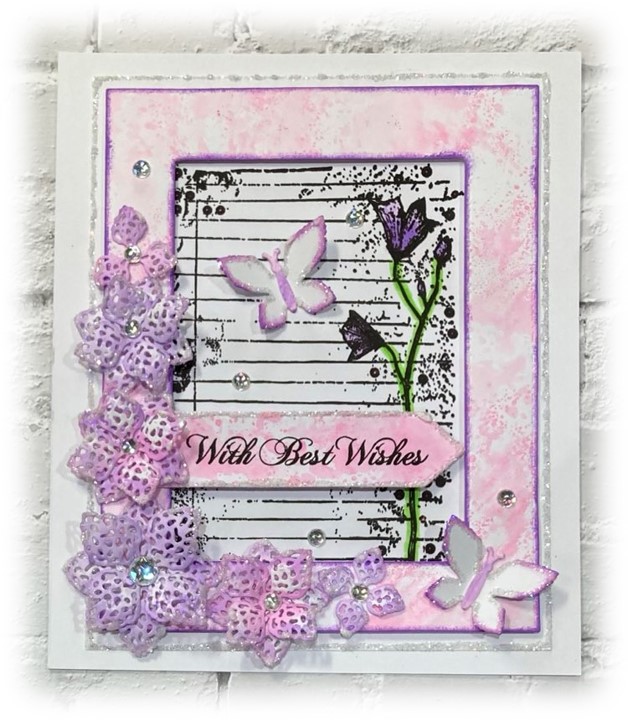
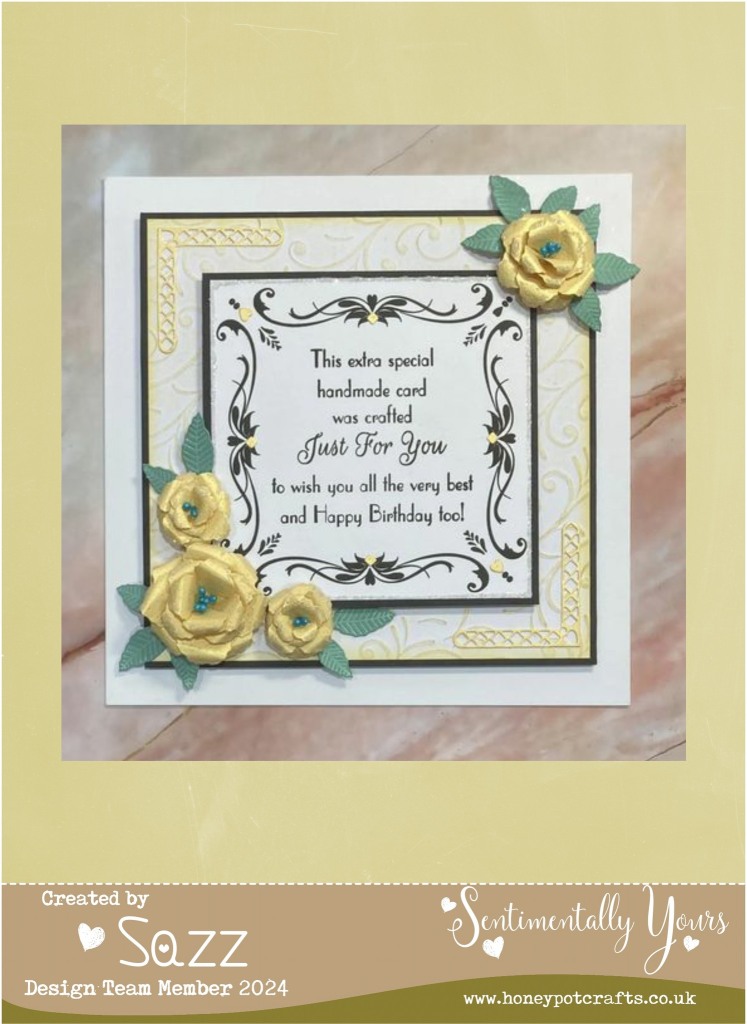
To continue our step by step mixed media projects using the Sentimentally Yours flawless media range, Angela has broken down the steps to be able to achieve this gorgeous project. Make sure you share your makes on our Facebook page as we love to see them.

Sentimentally Yours Products Used:
Premium A4 270gsm card – pure white & lavender meadow
Floral finery – delightfully dotty & fantastic fronds
Framed sentiments collection – birthday wishes
Adornments collection – traditional top layering stitched tag dies
6″ x 6″ stencil – extravagance
Flawless media metallic acrylic paint – rose & heliatrope
Porcelain white pearls
Crystal gemporium flat backed gems – aurora
Premium PVA glue
Fine spray water mister
A3 heat resistant heat mat


Other Products Used:
Pinflair glue gel
Foam tape
7″ x 7″ card blank
Twine
Stippling brush
Scotch removable tape

Step by Step Instructions:

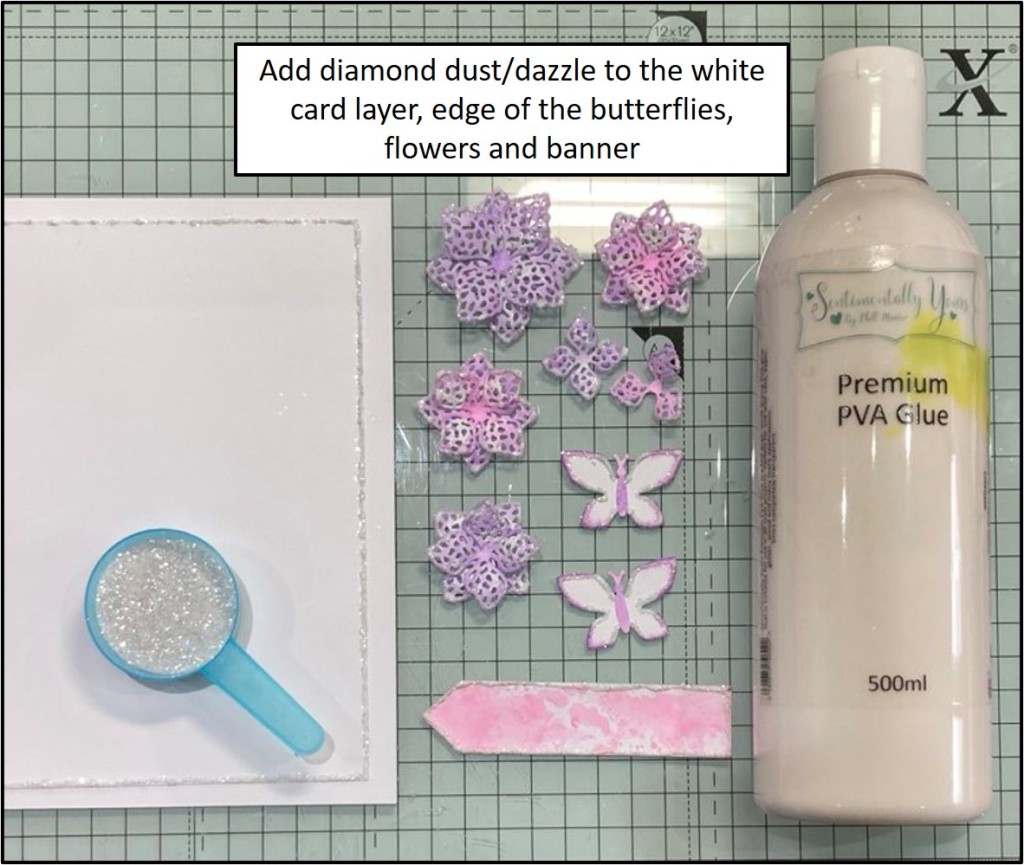
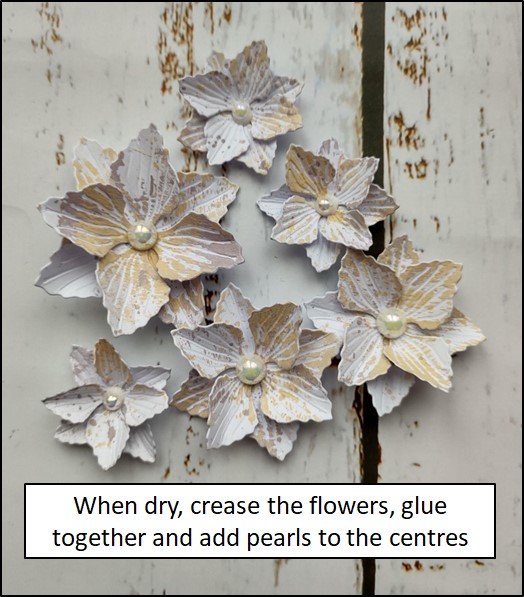
  • Place a small amount of rose and heliatrope metallic paint onto your craft mat and add just one fine mist of water. Mix the colours together.
  • Lightly dab a piece of white cardstock into the paint to create a random pattern. Add more water if needed. Set aside to dry.
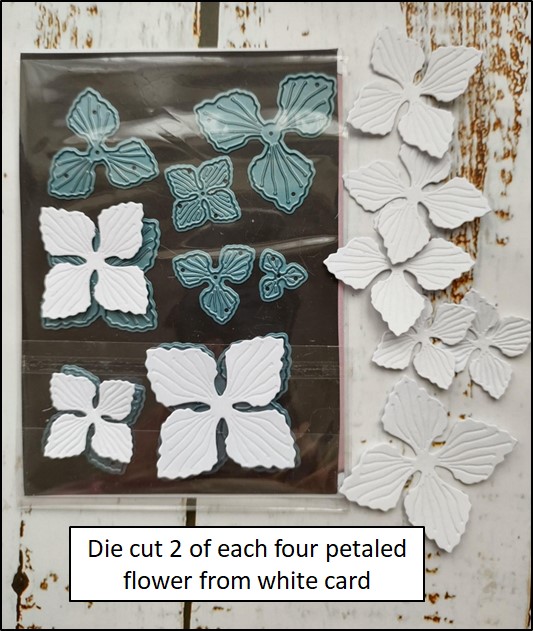
  • Once dry, die cut a selection of flowers, arrange together finishing with a pearl in each centre.
  • Die cut birthday wishes using the same cardstock and lavender meadow and glue together.
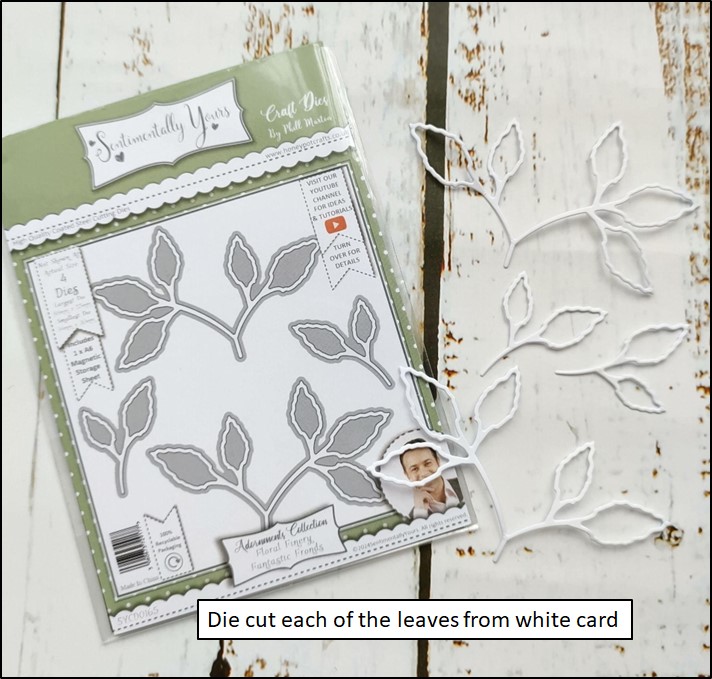
  • Die cut a selection of foliage from the white cardstock.
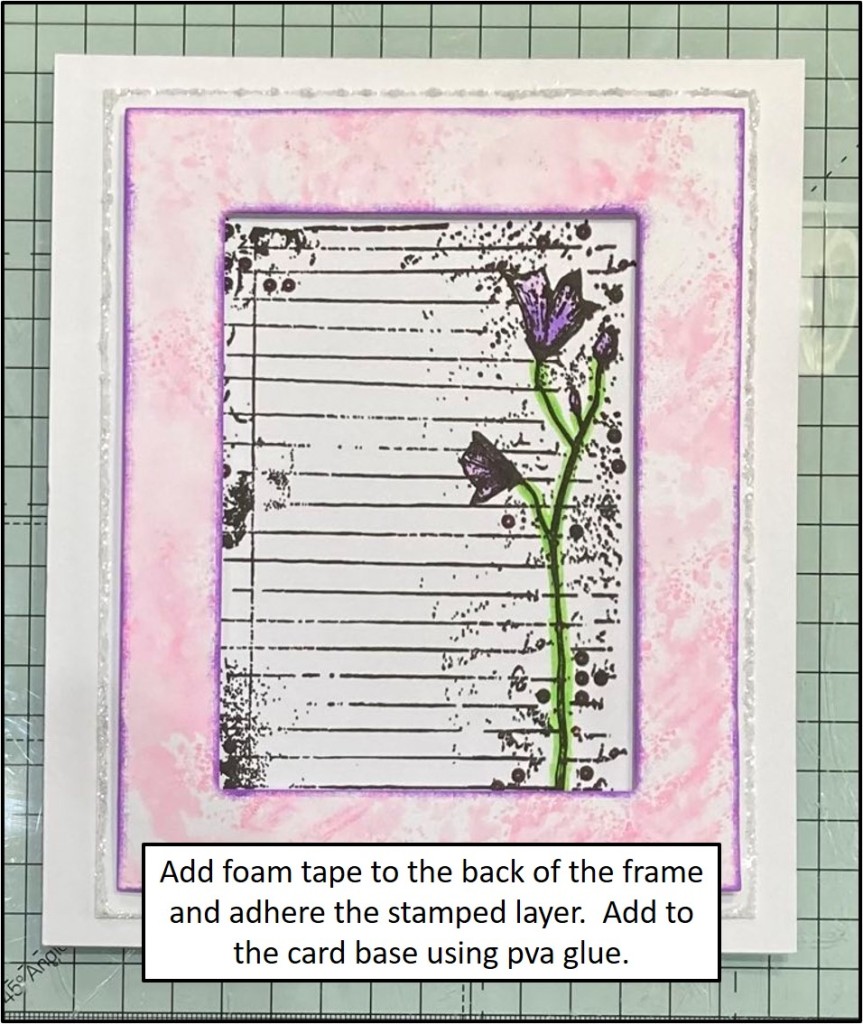
  • Cut a square of lavender meadow card slightly smaller than the 7″ x 7″ card blank and adhere using foam tape.
  • Cut a smaller square from white card and secure the stencil over the card using removable tape.
  • Use a stipple brush to add the rose and heliatrope metallic paint through the stencil, one colour at a time. Remove the stencil and set card aside to dry.
  • Mist the stencil with water to reactivate the paint, place the wet side down onto a piece of white card to create a negative print of the stencil design. Set aside to dry.
  • Once dry, adhere the square stencilled card onto the lavender meadow card using foam tape.
  • Die cut the outer tag from lavender meadow card and the inner tag from the negative stencilled card. Affix together and add twine.
  • Add glitter to the outer edge of the card blank and inner tag.
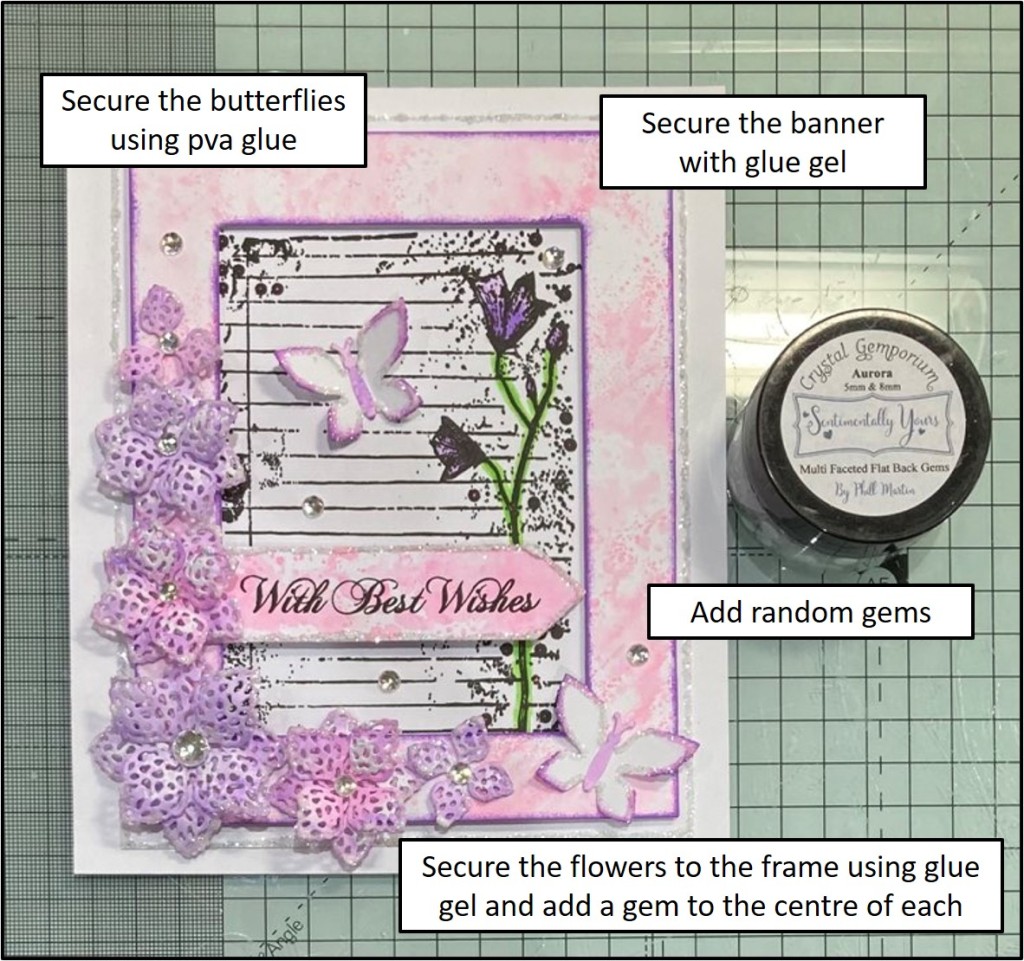
  • Adhere the tag to the card using foam tape.
  • Arrange and adhere the flowers and foliage using glue gel.
  • Affix the sentiment using glue gel so it overlaps the right hand side of the tag and card.
  • Finish by adding 3 gems to the top left hand side and the bottom right of the card.

Top Tip: Place the cardstock under something heavy when drying to help prevent it from warping.

Hope you have fun trying this out. Remember to secure your place on the sofa for tonights live.

Until next time …..

Top Fold Framed Card

Hello crafters, hope you are all well!

If you watched Phill’s live on Monday night you will have seen him create a beautiful A5 top fold card using the floramusica range of stamps. For his demo he chose to use the bluebell medley, but you also have a daffodil, rose, tulip, hydrangea, iris, dandelion, lily and daisy medley. Each stamp includes smaller images of keys, postmarks, butterflies, dragonflies and much more. For those that want to get ahead with their Christmas cards, there are also four of those too. Get them whilst they are still in stock as once they’re gone, they’re gone!!!

If you would like to watch Phill’s demo again, just click on the image below and it will take you straight there. These demos are so much fun with banter, giggles and of course all the hints and tips.

I had fun recreating Phills card yesterday as well as adding my own little touches (those of you that know me, know that I love to be different). So if you would like to have a go, please read on….

Sentimentally Yours Products Used:

Other Products Used:

Card Layers:

  • A5 top fold card blank, cut down to 18cm x 15cm
  • Ice white card cut to 13cm x 16.5cm for layering/glittering
  • Ice white card cut to 10.5cm x 13.5cm for stamping
  • Ice white card 13cm x 16cm to die cut frame
  • Scrap white card for die cutting the banner, butterflies and flowers

This process was repeated on the banner and half of the flowers.

Wilted violet distress oxide ink was added to the edge of the frame and the butterflies using a finger dauber.

Add the ice white card layer to the card base with pva glue.

Hope you’ve enjoyed this tutorial and found it easy to follow. Please leave us a like or a comment so that we know you’re enjoying these tutorials.

Until next time…

With Love Card

Today is a momentous one here in the UK as it’s the London Marathon. Do you know anyone that’s running? Will you be watching and trying to spot them?

Phill and Karen were at the Stamping Together Festival at Port Sunlight yesterday. Were you able to pop along and watch some demos and get inspiration to take home and try for yourselves?

Lozzy has more inspiration for you today where we can see how she made one of her cards from the recent Flawless Media shows on Create and Craft. We’re in for a real treat with this one as Lozzy has recorded a video which can be viewed on her YouTube channel. Just click on the image below and it will take you straight there.

We love to see your makes, so please share them on the Crafting with Phill Martin and Sentimentally Yours facebook page. Phill does a live on a Monday night at 7pm and another on a Thursday night at 7pm too. There is loads of inspiration, techniques, friendly banter and time spent with like minded crafters. We’ll see you there, pop over and say hi.

Enjoy Lozzy’s video and we will see you again soon!

Tuesday Night Live – 16/04/24

It’s Friday! Yay!! Hope you’ve got some crafting time planned for this weekend.

If you were watching Phill’s live on Tuesday night, you will have seen that he did a lovely fancy fold. If you would like to view the video again or watch it for the first time click on the image below and it will take you straight there.

A few of you have already had a go at making this style of card, check out these cards from Elaine Horroll and Georgeen Morton. Aren’t they gorgeous?

If you would like to have a go at this fun fold, we have created a picture tutorial showing you the sizes. Make sure you share your creations with us on the facebook page.

Here’s another option for a larger, square version:

Hope you have fun creating.

“You’re the Best” Card

Welcome to a brighter day here in the UK. Hope the sun is shining where you are too and that you are getting to spend some time indulging in your crafts.

Just when we think we’ve seen all of the techniques, we always come across a new one, don’t we? Whether it be a new way to use something we already have or find a new fancy fold. We’re always learning!

Phill’s last shows on Create & Craft were all about his Flawless Media range and how to use them. When we talk about mixed media, it just means using a combination of different materials and substrates. It’s nothing scary, just a different way to create our masterpieces.

The design team will be giving you an insight over the next week or so into their mixed media projects and hopefully making it less scary for those that would like to try it out. Maybe it’s your first time! We’ll hold your hand throughout and welcome any questions if you’re not sure.

First up is Helen, who not only shows us how to create this gorgeous project, it’s also a good idea for the men in our lives. Who else struggles with male cards?

Sentimentally Yours Products Used:
Premium A4 270gsm card – airforce blue, blue sapphire & pure white
DL stencil – mechanation
A5 greyboard – mechanicals
Embossing folder – double diamonds
Adornments collection – debossed stitched flags & banners die set
Adornments collection – elegance script essential stamp set
Flawless media – texture medium
Flawless media metallic acrylic paint – teal & vintage gold
Crystal gemporium flat backed gems – cornflower blue
Glitter – diamond dust
Premium PVA glue

Other Products Used:
Double sided tape
Pinflair glue gel
Spatula
Foam tape
7″x5″ card blank
Paint brush

Step by Step Instructions:

  • Cut a piece of blue sapphire card to 6.5″ x 4.5″ and attach to the card blank with foam tape.
  • Cut a piece of airforce blue card to 6″ x 4″ and attach to the card base with double sided tape.
  • Cut a piece of pure white card to 5.5″ x 3.5″, emboss with the double diamonds embossing folder and attach to the card base with double sided tape.
  • Cut 2 pieces of sapphire blue card to 7cm x 7cm and 2 pieces of pure white card to 6.5cm x 6.5cm.
  • Mix a small amount of texture medium on a craft mat with a small amount of teal acrylic paint.
  • Use a spatula to add the coloured texture medium through the mechanation stencil onto the 2 pieces of 6.5cm x 6.5cm pure white card and leave to dry. TOP TIP: wash your stencil in warm water straight away.
  • Choose 6 greyboard cogs. Paint 4 with the teal acrylic paint and 2 with the vintage gold.
  • Die cut a banner from the charmed flags and banner die set and stamp with a sentiment of your choice from the elegant script sentiments stamp set.
  • Assemble the card as shown in the picture attaching everything with pinflair glue gel.
  • To finish add cornflower blue gems and diamond dust glitter around the 5.5″ x 3.5″ pure white layer.

We’d love to see your finished projects in the facebook group, it’s a great place to share our makes, watch the lives and it’s safe too as we’re all crafters!

Until next time …

Just for You Verse Card

Welcome to another wet and rainy day in the UK, I think we should all be buying boats instead of cars! When will this rain stop?

Did you watch Phill’s live on Facebook and YouTube last night? It’s great to learn new techniques isn’t it? How many of you are going to try it out for themselves? If you missed the live you can watch it again by clicking on the picture below.

Over the last couple of weeks the design team have been sharing their step by step A6 verse stamp projects with you. We hope you’ve enjoyed the inspiration and that it has given you some ideas to have a go yourselves.

Today it’s the last of the A6 verse stamp tutorials and it’s my turn (Sazz) to share my project with you.

Sentimentally Yours Products Used:

Other Products Used:

Step by Step Instructions:

  • Cut a piece of ice white card to 21cm x 21cm and another piece to 21cm x 22.5cm.  Score the larger piece at 21cm to form a hinge.  Adhere the smaller piece to the hinge to form your card base. 
  • Die cut an 18cm square from elegant ebony card, add foam tape to the back and adhere centrally to the card base.
  • Cut a piece of ice white card to 17.5cm x 17.5cm and emboss using the classic flourish embossing folder.
  • Use a brayer to add scattered straw distress oxide ink to the raised areas and a finger dauber to edge with the same ink. Adhere centrally to the card base.
  • Die cut a 12.5cm square from elegant ebony card, add foam tape to the back and adhere centrally to the card base.
  • Cut a piece of ice white card to 12cm x 12cm and place into the corner of a stamping platform.  Stamp the just for you verse in the centre using nocturne versafine clair ink.
  • Whilst still in the platform, position the large flourish from the old and crabby verse centrally along one edge, stamp using versafine clair nocturne ink. Rotate your card 90 degrees and stamp again.  Repeat twice more.
  • Keep your card in the platform and position the larger spray from the bigger cake verse in the corner between the flourishes.  Ink with versafine clair nocturne ink and rotate as before on the other corners.
  • Keep your card in the platform and position the heart dots from the old and crabby verse in the corner between the flourishes.  Ink with versafine clair nocturne ink and rotate as before on the other corners.
  • Adhere centrally to the card base and add diamond dust glitter to the outside edge of this layer.
  • Die cut four of the smaller droplet sprig corners from pale gold lustre card, cut away the droplets and adhere to the corners of the embossed layer.
  • Die cut the flowers using delightfully dotty from pale gold lustre paper.  Add stamens or pearls/gems to the centres.  Add a small amount of glue to the petals and sprinkle with diamond dust glue.  Once dry, add to the card base with pinflair glue.
  • Die cut the fabulous frond leaves from olive grove card and tuck them under the flowers adding more glue if needed

Until next time….

Birthday Wish Verse Card

It’s been a different week this week. Firstly it was bank holiday Monday and Mr M had a day off (how dare he!!!!!) so there was no live. Then he was on TV on Thursday so no happy hour, but that was rescheduled to last night (Friday) so we didn’t miss out. If you saw the happy hour last night, wasn’t it a great deal? Remember you have to be part of the Crafting with Phill Martin and Sentimentally Yours facebook page to be able to watch and take advantage of these fantastic, never to be repeated offers.

Today we’re sharing a project from Lozzy who’s giving us pictorial step by step instructions to replicate her card. There’s some great techniques in this card, why not give them a go?


Sentimentally Yours Products Used:
Birthday wish special day verse
Floral finery – practically perfect & floral frond dies
Stately debossed double stitched rectangle dies
Traditional top layering stitched tag dies
Texture die – grid
Quintessentially quilted embossing folder
Premium card – white, vanilla & kraft
Chalky acrylic paints – frosted heather & gentle peach
Premium PVA glue
Pearls – ivory shimmer
Brayer
Acrylic stamping block

Other Products Used:
A5 kraft card blank
Versafine clair – fallen leaves
Paper trimmer
Die cutting machine
Glue gel
Fan brush
Organza ribbon

What a beautiful project! Hope you enjoyed Lozzy’s pictorial instructions and this gives you inspiration to try it for yourself. Remember we love to see your creations and it gives others inspiration too!

We will be showing you tutorials from the flawless media shows next week and here are the projects we will be sharing with you.

Until next time……

Special Day Verse Card

Hope you all had a good Easter and managed to spend time with your family and friends. Can’t believe it’s April already, isn’t this year just flying?

Today we have a project created by Ilona who’s sharing step by step instructions on how she made it. This would be great for a milestone birthday wouldn’t it?

Sentimentally Yours Products Used:
Just saying special day verse
Floral finery – practically perfect & fabulous fronds
Debossed double stitched chic label die set
Premium white card
Silvery moon lustre card
Premium PVA glue
Pearls – silver star

Other Products Used:
A3 card
Foam tape
Versafine clair – morning mist

Instructions:

  • To make the card blank, take a piece of A3 card, score at 8″ on the long side, fold and cut down to 8″ x 9.75″.
  • Take the third largest debossed double stitched chic label die and cut from white card. Stamp the flourishes and verse with versafine clair morning mist ink as shown in the picture above.
  • Create a mat layer by die cutting the second largest chic label die from silvery moon lustre card and glue both together.
  • Cut a piece of white card measuring 7.25″ x 9″ and glue the topper onto it. Stamp the flourishes around the label shape and in the corners using versafine clair morning mist ink.
  • Cut a piece of silvery moon lustre card to 7.5″ x 9.25″ and use foam tape to attach to the card base. Glue the other pieces on top.
  • Die cut the practically perfect flowers and the fabulous fronds from silvery moon lustre card. Shape the flowers and glue together placing a pearl in the centre of each.
  • Glue the flowers and fronds around the edge of the shaped topper.

We would love to see your creations following these instructions. Remember to share them on the Crafting with Phill Martin and Sentimentally Yours facebook group so that it gives others inspiration too.

Phill will be on Create and Craft this Thursday (4th April), with two shows (1pm & 5pm) spotlighting his flawless media products which include chalky acrylic paints, texture mediums, metallic acrylic paints and radiant lustre pigment powders. Watch him get creative with these and see how clean he keeps his hands!

Keep your eyes peeled for the new monthly challenge and the winner of last months challenge.

Until next time…

Lovely Day Verse Card

Happy Easter, hope you’re all enjoying the long weekend and have found some time to spend crafting.

Today we have another step by step tutorial and this time it’s Helen’s turn to share her inspiration with you. This card was made with one of the new just saying verses. Not only are they great verses, but each one has flourishes of different sizes to extend the verses and make them look really elaborate. Pop over to the Honeypot Crafts website to check out the six different sets. There’s also 20% discount for the bank holiday weekend on all orders over £20, so why not indulge yourself to your own Easter treat. There’s no calories in craft supplies!!!

Sentimentally Yours Products Used:
Just saying bigger cake verse
Ice white, olive grove & lavender meadow card
Floral finery – perfectly plain & fabulous fronds
Beautiful butterflies die set
Crystal gemporium flat backed gems – ice diamond
Diamond dust
Premium PVA glue
Acrylic circles stamping blocks (set of 3)
Precision tweezers & gem pick up tool

Other Products Used:
8″x8″ card blank
Glue Gel
Foam tape
Versafine clair – monarch
Stamping platform
Double sided tape
Bone folder
Die cutting machine
Ball tool
Embossing mat for shaping flowers

Instructions:

  • Cut a 7.5″ x 7.5″ layer from ice white card, another to 5″ x 5″ and another to 4.5″ x 4.5″.
  • Cut a 7″ x 7″ layer from lavender meadow card.
  • Attach the 7.5″ x 7.5″ white layer to the card blank using foam tape.
  • Stamp the lavender card using the flourishes from the bigger cake verse stamp set using versafine clair monarch ink. Attach to the card using double sided tape.
  • Attach the 5″ x 5″ ice white layer with foam tape.
  • Stamp the bigger cake verse onto the 4.5″ x 4.5″ white layer using versafine clair monarch ink. Attach to the card using double sided tape.
  • Die cut perfectly plain flowers from lavender and white card and stamp using the little extras in the stamp set with versafine clair monarch ink.
  • Shape the flowers and glue together.
  • Die cut fabulous frond leaves from olive grove card and shape.
  • Attach the flowers and leaves to the card as shown in the picture using glue gel.
  • Die cut the smallest butterfly from lavender card, shape the wings using a bone folder and attach to the card.
  • Add diamond dust around the edge of the lavender card and the smaller white layer.
  • Finish by adding ice diamond gems.

Hope you can have a go at Helen’s card, maybe try it in a different colour, you’ll be amazed at how different it looks. Please share your makes in our Crafting with Phill Martin and Sentimentally Yours facebook group to give others inspiration to have a go.

Enjoy your long weekend and don’t eat too much chocolate!

Monday Night Live – 25/03/24

Welcome to our little corner of creativeness.

Phill does a Monday night live each week (unless he’s on holiday or at the TV studio) which is shown simultaneously on the Sentimentally Yours facebook page and YouTube channel. If you want to make a note in your diaries, they start at 7pm (UK time).

We were spoilt last night as we had two projects to inspire us, one for the boys in our lives and the other for the girls. Both were using the A6 verse stamps and flourishes, but the finished cards looked completely different. Each set is so versatile as they each have separate flourishes that can be mixed and matched to make endless compilations. Click on the image below to see each set in detail.

If you missed last nights live, you can click on the image below and watch it or just refresh yourselves of how the cards were created.

Don’t forget to post your makes on the Crafting with Phill Martin and Sentimentally Yours facebook group as we love seeing your creations and you give inspiration to others too. Keep your eyes peeled later in the week for another step by step from one of our design team.

Until next time …