Hello crafters, hope you’re all well and enjoying your creative time.
Have you signed up for Phill’s next online workshop? It’s on Sunday 9th June and we will be making a multi pocketed wallet with note paper and four note cards which has, of course, been created by the man himself! You really don’t want to miss out, the workshops are so much fun and packed full of tips and techniques. Today is the last day to sign up, so get over to the website and get booked on! You don’t have to be there on Sunday to do the workshop in real time, Phill will send you a link to the recording and you can follow along in your own time. Can’t wait 🙂
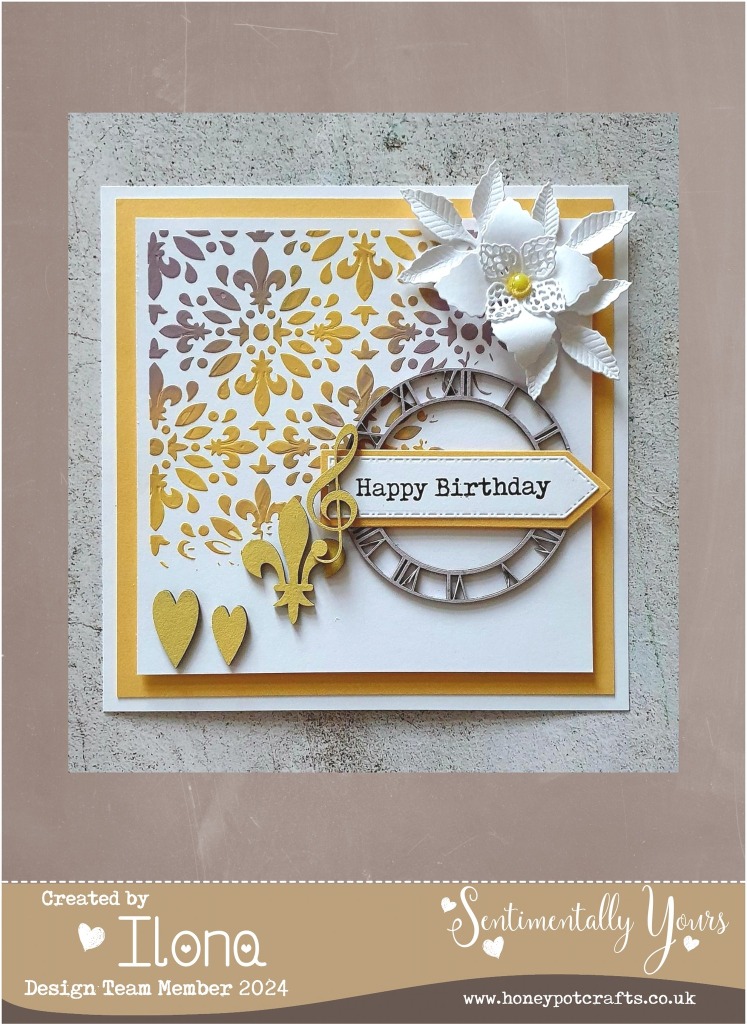
Do you lose your mojo sometimes? Do you need inspiration to get you back on track? Well the design team are here to give you step by step instructions for cards they have made to get you going on your creative journey again. Today’s project is from Ilona and she is showing us how to use greyboard and the gorgeous chalky acrylic paints. Let’s get started …

Sentimentally Yours Products Used:
Premium A4 270gsm card – pure white & summer citrine
Floral finery – perfectly plain, lacy loveliness & fabulous fronds die sets
Debosssed stitched flags & banners die set
Chalky acrylic paint – banana split & frosted heather
Rustic typewriter essential sentiments stamp set
Fanciful 6″ x 6″ stencil
Greyboard – fleur de lis & clocks
Texture medium
Pearls – sunshine shimmer
Premium PVA glue
Other Products Used:
7″ x 7″ card blank
Pinflair glue gel
Die cutting/embossing machine
Scotch removable tape
Step by Step Instructions:
- Cut summer citrine card to 6.5″ x 6.5″ and adhere centrally to the 7″ x 7″ card base.
- Cut pure white card to 6″ x 6″ and attach your stencil, securing in place using repositionable tape.
- Mix banana split chalky acrylic paint with texture medium and repeat with frosted heather. Remember you only need to use a tiny amount of paint.
- Apply the coloured texture medium, one colour at a time, diagonally across the card as in the picture above. Make sure you clean the spatula when changing colours. Leave to dry.
- Once dry, add foam tape to the white layer and place centrally to the card base.
- Die cut the flowers and leaves from white card, shape and assemble the flowers. Add a pearl to the centre of the flower.
- Add chalky paint to the greyboard pieces using both colours.
- Die cut the outside of your banner from summer citrine card and the internal banner from white card.
- Stamp your sentiment using versafine clair nocturne ink to the white banner. Layer the pieces together using pva glue.
- Adhere the greyboard clock using pva glue towards the bottom right hand corner of the card.
- Add the sentiment banner using glue gel to raise it up.
- Add the flower and the leaves to the top right corner using glue gel.
- Add the other greyboard pieces towards the bottom left of the card using both glue gel and pva glue to alternate the heights.
- You can add random pearls and glitter if you wish.
We hope you’ve enjoyed Ilona’s tutorial and you are able to follow along and make one of your own. Remember to add it to our facebook group as we all love to see how different projects look when you have used different colours and stencils. You may want to make it to fit in with the monthly challenge! Check out the facebook group for details. The winner is chosen by a random number generator so everyone is in with a chance of winning. Here’s the link to the challenge.
For the members of our facebook group, Phill has a happy hour on a Thursday night at 7pm where we are given a fantastic, better than half price offer which is available from 7pm until 8.15pm. He also makes a project using the happy hour deal, so it’s a win, win! Make sure you’re part of our lovely crafting family.
Until next time ……


Fantastic card & colour choice xx
LikeLike
what a lovely card
LikeLike
beautiful card xx
LikeLiked by 1 person