Birthday Wishes Card

Welcome to a new week and of course as it’s Monday it means that Phill will be live on Facebook and YouTube this evening at 7pm (BST). What will he be wow’ing us with this evening? New products? New techniques? What we are guaranteed of though, is a good laugh and friendly banter. See you there to join in the fun!

To continue our step by step mixed media projects using the Sentimentally Yours flawless media range, Angela has broken down the steps to be able to achieve this gorgeous project. Make sure you share your makes on our Facebook page as we love to see them.

Sentimentally Yours Products Used:
Premium A4 270gsm card – pure white & lavender meadow
Floral finery – delightfully dotty & fantastic fronds
Framed sentiments collection – birthday wishes
Adornments collection – traditional top layering stitched tag dies
6″ x 6″ stencil – extravagance
Flawless media metallic acrylic paint – rose & heliatrope
Porcelain white pearls
Crystal gemporium flat backed gems – aurora
Premium PVA glue
Fine spray water mister
A3 heat resistant heat mat


Other Products Used:
Pinflair glue gel
Foam tape
7″ x 7″ card blank
Twine
Stippling brush
Scotch removable tape

Step by Step Instructions:

  • Place a small amount of rose and heliatrope metallic paint onto your craft mat and add just one fine mist of water. Mix the colours together.
  • Lightly dab a piece of white cardstock into the paint to create a random pattern. Add more water if needed. Set aside to dry.
  • Once dry, die cut a selection of flowers, arrange together finishing with a pearl in each centre.
  • Die cut birthday wishes using the same cardstock and lavender meadow and glue together.
  • Die cut a selection of foliage from the white cardstock.
  • Cut a square of lavender meadow card slightly smaller than the 7″ x 7″ card blank and adhere using foam tape.
  • Cut a smaller square from white card and secure the stencil over the card using removable tape.
  • Use a stipple brush to add the rose and heliatrope metallic paint through the stencil, one colour at a time. Remove the stencil and set card aside to dry.
  • Mist the stencil with water to reactivate the paint, place the wet side down onto a piece of white card to create a negative print of the stencil design. Set aside to dry.
  • Once dry, adhere the square stencilled card onto the lavender meadow card using foam tape.
  • Die cut the outer tag from lavender meadow card and the inner tag from the negative stencilled card. Affix together and add twine.
  • Add glitter to the outer edge of the card blank and inner tag.
  • Adhere the tag to the card using foam tape.
  • Arrange and adhere the flowers and foliage using glue gel.
  • Affix the sentiment using glue gel so it overlaps the right hand side of the tag and card.
  • Finish by adding 3 gems to the top left hand side and the bottom right of the card.

Top Tip: Place the cardstock under something heavy when drying to help prevent it from warping.

Hope you have fun trying this out. Remember to secure your place on the sofa for tonights live.

Until next time …..
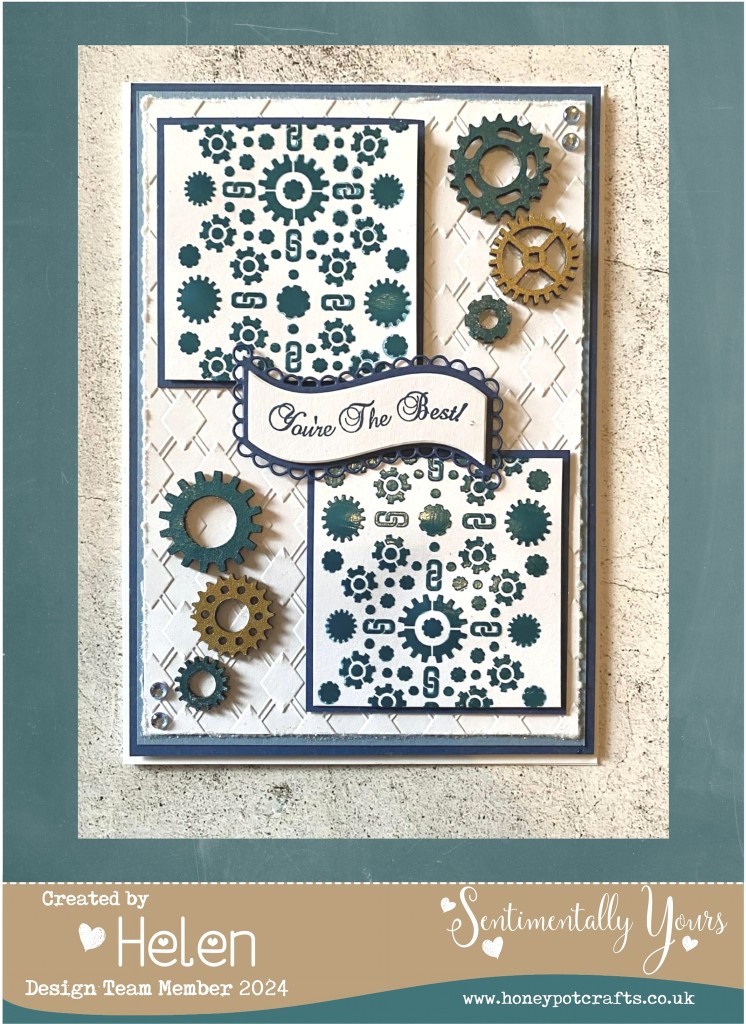
“You’re the Best” Card

Welcome to a brighter day here in the UK. Hope the sun is shining where you are too and that you are getting to spend some time indulging in your crafts.

Just when we think we’ve seen all of the techniques, we always come across a new one, don’t we? Whether it be a new way to use something we already have or find a new fancy fold. We’re always learning!

Phill’s last shows on Create & Craft were all about his Flawless Media range and how to use them. When we talk about mixed media, it just means using a combination of different materials and substrates. It’s nothing scary, just a different way to create our masterpieces.

The design team will be giving you an insight over the next week or so into their mixed media projects and hopefully making it less scary for those that would like to try it out. Maybe it’s your first time! We’ll hold your hand throughout and welcome any questions if you’re not sure.

First up is Helen, who not only shows us how to create this gorgeous project, it’s also a good idea for the men in our lives. Who else struggles with male cards?

Sentimentally Yours Products Used:
Premium A4 270gsm card – airforce blue, blue sapphire & pure white
DL stencil – mechanation
A5 greyboard – mechanicals
Embossing folder – double diamonds
Adornments collection – debossed stitched flags & banners die set
Adornments collection – elegance script essential stamp set
Flawless media – texture medium
Flawless media metallic acrylic paint – teal & vintage gold
Crystal gemporium flat backed gems – cornflower blue
Glitter – diamond dust
Premium PVA glue

Other Products Used:
Double sided tape
Pinflair glue gel
Spatula
Foam tape
7″x5″ card blank
Paint brush

Step by Step Instructions:

  • Cut a piece of blue sapphire card to 6.5″ x 4.5″ and attach to the card blank with foam tape.
  • Cut a piece of airforce blue card to 6″ x 4″ and attach to the card base with double sided tape.
  • Cut a piece of pure white card to 5.5″ x 3.5″, emboss with the double diamonds embossing folder and attach to the card base with double sided tape.
  • Cut 2 pieces of sapphire blue card to 7cm x 7cm and 2 pieces of pure white card to 6.5cm x 6.5cm.
  • Mix a small amount of texture medium on a craft mat with a small amount of teal acrylic paint.
  • Use a spatula to add the coloured texture medium through the mechanation stencil onto the 2 pieces of 6.5cm x 6.5cm pure white card and leave to dry. TOP TIP: wash your stencil in warm water straight away.
  • Choose 6 greyboard cogs. Paint 4 with the teal acrylic paint and 2 with the vintage gold.
  • Die cut a banner from the charmed flags and banner die set and stamp with a sentiment of your choice from the elegant script sentiments stamp set.
  • Assemble the card as shown in the picture attaching everything with pinflair glue gel.
  • To finish add cornflower blue gems and diamond dust glitter around the 5.5″ x 3.5″ pure white layer.

We’d love to see your finished projects in the facebook group, it’s a great place to share our makes, watch the lives and it’s safe too as we’re all crafters!

Until next time …

Friday Live Card – 24th April 2020

Here is the card Phill made during his Friday Facebook Live on 24th April.

It uses the Sentiment Medallion Wrap and Coins,  Romantique Flower Dies, Double Debossed Circle Dies. This card uses the Olive Grove and Pure White Card Stock and Olive Vine Embossing Powders.  It also has Porcelain White Pearls in the centre of the flowers.

On Phills live show he used Storm Grey Card with Smokey Quartz Embossing Powder, Vellum, Enchanting Flowers Dies and the Triple Layering Diamond Stencils. He also mixed Diamond Dazzle, Luna Holographic and Rainbow Crystals Glitters! Lush!

271B1E00-3FAE-43AF-92B4-E91164C08920

Stage 1 – cut out all the layers needed as below

  • Card blank is 23 x 17.5cm
  • 1st layer – Olive – 22 x 16.5cm
  • 2nd layer – White – 21 x 15.5cm
  • 3rd Layer – Olive Embossed – 18 x 13cm
  • Strip – 3cm wide
  • Circle Die Layers (Except the Wrap and Coins)
  • Flower Dies.

Stage 2 – stamp the Medallion Wrap onto White Card using the Olive Vine Embossing Powders.  Stamp the Sentiment Coins onto white and the small words onto Olive Grove.  Use the Circle Dies to cut these out for layering later.

Stage 3 –  Using the Embossing Powder, stamp the borders onto the strip of card. Then add the centre part design of your choice.

Stage 4 – Layer up the circle dies and other card layers onto the card blank. Use foam tape where you wish. Glitter the edges where you like!

Stage 5 –  Use the extras on the Medallion Wraps to stamp each petal on the plain white flowers.  Assemble the flowers and allow the glue to dry a little.

Stage 6 – add the flowers, leaves and pearls to your card!

Here’s what we used with links to the website…..

Sentimentally Yours

Others

We hope you enjoy making this card!

Karen Signature

Christmas Delight

Here’s a lovely Christmas cards made during our workshops.

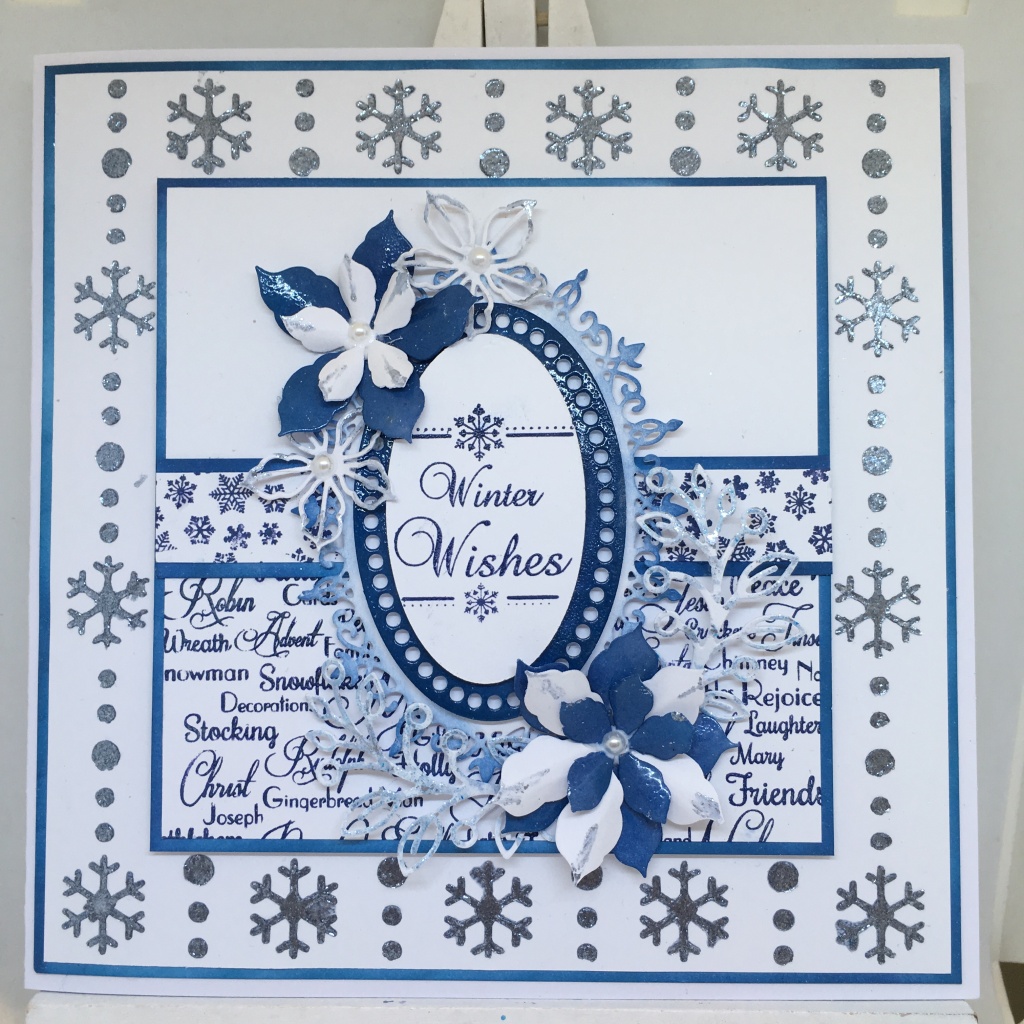
This card uses Phill’s Triple Layering Stencils and Christmas DL Silhouette Stamps with either inks or embossing powders.  We have also used The Stately Double Debossed Squares and Sue Wilson Poinsettia Dies.

The Full Card

Photo 30-11-2019, 12 37 21

Stage 1 – Cut out all the layers and die cuts needed as below:

  • Base Card is 19cm x 19cm
  • Top/Bottom Inked Panel – 18.5cm x 5.5cm (x2)
  • Top/Bottom Stenciled Panel – 18cm x 5cm (x2)
  • Stately Double Debossed Squares – x2 on front and x2 inside
  • Image Piece – 9cm x 9cm
  • Poinsettia and Holly

TIP – We cut the card at 6cm down from the top and used the offcut to create some of the other panels to save card!

Stage 2 – Choose 1, 2 or 3 stencils to create your stenciled panels and the same number of coordinatng inks. Decide if you want to layer the pattern or offset the pattern – it looks stunning either way! Working with largest stencil first create your own unique background on both panel pieces.

TIP – Start with the lightest colour, especially if you are layering the patterns on top of each other.

Stage 3 – Choose your DL Silhouette stamp and either ink or one of the stunning embossing powders to create the main image.

TIP – don’t forget these are long stamps, so choose which part of the stamp you want to use and make sure it fits securely on your stamping platform so you can stamp the image a few times for full coverage.

Stage 4 – Ink up the Double Debossed Squares for the front and inside.  Colour the Poinsettias if you wish.

stage 5 – Assemble the layers, using foam tape where you wish. Finish with glitter or pearls!

Other samples…..

This slideshow requires JavaScript.

Here’s what we used with links to our www…..

Sentimentally Yours Products:

Other Products:

We hope you enjoy making this card!

Karen Signature

Stencils and Luna Paste

Hello crafters!

Here’s a card made at our regular card making workshops.

It uses Phill’s 8×8 Stencils, Christmas Sentiment Cloud Stamps, Background Stamps and Various Christmas Sentiment Stamps. We have also used The Angelina Die Frame, Classic Poinsettia and Poinsettia Additions and Christmas Leaf dies.

Our main sample card uses  Chipped Sapphire Oxide, Snowflake Trails Stencil, Christmas Sentiment Cloud, Snowflake Background Stamp and Snowflake Sentiments Stamps.  The Luna Paste is Moonlight Storm.

IMG_6748

Stage 1 – cut out all the layers and die cut shapes are below

  • Card Blank – 21cm x 21cm
  • Layer 1 – 20.5cm x 20.5cm (inked)
  • Layer 2 – 19.5cm x 19.5cm (stencil)
  • Layer 3 – 14.5cm x 14.5cm (inked)
  • Layer 4 – 14cm x 14cm (stamped)
  • Border strip
    • 14.5cm x 2.5cm (inked)
    • 14cm x 14cm (stamped)
  • Die Cuts
    • Sue Wilson Angelina Frame
    • Sue Wilson Classic Poinsettia
    • Sue Wilson Poinsettia Additions
    • Sue Wilson Berry Bough/Christmas Floral Stem

Stage 2 – Choose your 8×8 Stencil and Luna Paste and paste the 19.5cm layer.  Leave to dry.

Stage 3 – Choose a coordinating Distress Oxide Ink and ink the appropriate layers and parts of the Angelina die frame as you wish.  Ink the poinsettias as you wish

Stage 4 –  Stamp one of the Christmas Sentiment Clouds and apply clear embossing powder to make the ink shiny and stand out more.

3


Stage 5 – Choose a background stamp for the border layer and ink as above.

2

Stage 6 – Assemble all the layers and add glitter as you wish

Other card samples…

This slideshow requires JavaScript.

Here’s what we used with links to the website if you wish to purchase any items…

Sentimentally Yours:

Sue Wilson Dies:

Cosmic Shimmer Luna Paste

Ranger Distress Oxide Inks

We hope you enjoy making this card

Signature!

DL Silhouette Stamps

Hello crafters!

Here’s our latest blog post.  This card was made at our regular craft classes.

It uses Phill’s DL Silhouette Stamps, Essential Sentiments Labels, Stencils, Crackle Paste, Distress Oxides, Versafine Black Onyx Ink and Luna Paste. We have also used the new Feltmark card in Raven Black.

This card looks beautiful in Landscape or Portrait!

The Full Card

img_6530.jpg

Stage 1 – cut out the layers needed for the card as follows:

  • Base Card – 20cm x 17.5cm
  • Black Layer – 19cm x 16.5cm
  • White Layer – 18.5cm x 16cm
  • White Layer for Stamping Image – 17cm x 14.5cm
  • Double Pierced Frame – Raven Black Feltmark Card

Stage 2 – Choose a stencil and two coordinating colours of crackle paste.  Apply the lighter colour first, but only in small sections.  Then apply a smaller amount of the darker colours and merge into the lighter colour slightly.  Set aside to dry.

Stage 3 – Ink the background layer with three different colours of Distress Oxide.  Take time to blend them smoothly into each other and apply lightly top start with.  We have used a circle die to create the moon and held it in place whilst we inked.  We then splashed water onto the background.

1

Stage 4 – Ink a strip of card in the same colours to create the tag.  Choose a tag shape and stamp with the Versafine.  Then choose a matching sentiment and stamp.

Stage 5 – choose your DL Silhouette Stamp for the background layer.  You will need to lift this up from the bottom of the card to make sure you can see the image behind the frame.  We used Versafine again and a stamping platform just in case we missed a bit!  We rubbed Moonlight Silver over the moon to create the shimmery effect.

Stage 5 – Assemble the layers, using foam tape to lift the frame.  We also rubbed Luna over the crackle paste.

Other colour samples

This slideshow requires JavaScript.

Here’s what we used with links to the www……

Sentimentally Yours:

Sue Wilson – Double Pierced Rectangles

Cosmic Shimmer:

Palette Knife

Distress Oxides

Versafine Black Onyx Ink

We hope you enjoy making this card!

Signature!

Stencils, Glitter Kiss and Sparkly Fingers

Hello Everyone

I wanted to show you the card that we made at my workshops last week, making good use of Cosmic Shimmer Glitter Kiss and my Sentimentally Yours Stencils.

Have you used/tried Glitter Kiss yet? It’s an amazing product that can be used with stencils, embossing folders, direct to mdf/card, painted with, applied with a spatula to mixed media projects for texture and even to just cover your scraps of card with lovely sparklyness to be die cut at a later date!

It also dries waaaay quicker than regular texture paste!

The glitter in Glitter Kiss is the Cosmic Shimmer Polished Silk glitter, which is ultra fine, tiny, tiny specks of glitter and this makes it easy to work with and very different to Sparkle Texture Paste. The colours in Glitter Kiss are incredible and you can ‘build up’ layers of these colours and they won’t just all blob into one colour (technical term ha ha)

Here are two cards I made with my workshops last week, very different colours, very different finish (just imagine the Blue/Silver one as a Christmas Card with my Snowflakes Stencil!)

So, as always, here is a little list of what I used (with links to my website, should you ‘need’ to treat yourself to any of the products so you can recreate this card)

To begin, I applied the lighter colour of the Glitter Kiss through my stencil onto a solid stitched hexagon die cut (make sure it’s a little bigger than the aperture from the frame).  (I used my Spatula, why mess about with doing hundreds of swipes with a sponge when the spatula does it more easily!), then left this to one side for 5 – 10 minutes to give it some drying time (leave the stencil on). When you come back to it, the glitter kiss will be ‘touch’ dry, I then added the second, darker colour of glitter kiss in random areas (making sure I didn’t cover the base colour). If you look at the two cards I made, you’ll see I did ‘random’ on the Ice Blue/Green card and tried to do all the bottom left corners of the stencil design (not being too careful on the Blue Teal/Silver Chrome one… just gives it a different look 🙂

You can then remove the stencil and leave to dry (only takes 20 – 30 mins)

Whilst that was drying, I did the embossed piece of card… this is soooo easy!

As before, using my lightest colour of glitter kiss, I applied a small amount to my applicator sponge and with very light, sweeping motions, went from left to right across the piece of card. I did this on all the bits that would be visible. This dried very quickly, in fact, by the time you get to the bottom part of the card, the top will have dried!

(TOP TIP – Make sure you don’t have any lumps of glitter kiss on your applicator sponge as they will get stuck in the debossed areas of the card)

Just build up the amount of glitter kiss you have on the embossed areas until you’re happy.

I then turned my card around and did the same thing with the second, darker colour. What you end up with is a beautiful, glittery, two toned piece of embossed card (there’s just no other way you can achieve this so easily, not that I’ve found anyway)

To cover the die cut daisies and butterfly etc, just dab the glitter kiss straight on with your finger (don’t rub, as that just moves the product around) and repeat in the two colours until you’re happy with the finish. Trust me when I say, the glitter kiss just wipes off your finger/mats etc with a grime boss and it washes off your stencils easily in warm soapy water. You will have a lovely, sparkly finger!

To add the sentiment (this is why I love my corner sentiments), I used two co-ordinating colours of Distress Oxide ink pads and stamped the first half of the stamp on one section of the hexagon, then repeated on the next section of hexagon (clever, eh) Just remember to mask off the half of stamp you’re not using or you’ll get ink where you don’t want it!

I then just assembled the card as you see in the photos,, (you know me and my love affair with foam tape, there’s foam tape on both layers of the hexagons ha ha)

These are 7×7 cards and would work just as well on a smaller scale or as 8×8 cards with a bit more matting and layering.

Have a go… easy peasy 🙂

Hope you like these cards too, I’ve loved making them!

Finally, before I go, the winner of my last Giveaway Card (The Mustard Seed/Spiced Marmalade Distress Paints Card) is….

Julie Ironmonger

Well done Julie, can you email me your address to phill@honeypotcrafts.co.uk or send me a direct message on Facebook/Twitter etc

Happy Crafting!

Phill Signature 2

Dunking, Stamping, Dipping, Brushing with Distress Paints! (and a giveaway card)

Hi Everyone

You’ve probably heard of (or at least got a few) Distress Ink Pads, maybe Distress Oxide Ink Pads or some Distress Crayons even, but have you ever had a go with the fabulous Distress Paints?! (dabbers)

I have to confess, I’ve had mine for ages and only really ever used them with stencils or mdf, so I had a proper ‘play’ last week and created these cards.

I dry brushed with them, stencilled with them, diluted them with water, flicked them and yes, stamped with them… so many ways to use these and you can even watercolour with them!! (and it’s a very different finish to ink pads)

Now you know I don’t ‘do’ dirty or messy, but, actually, I don’t mind it (as long as the results are pretty!) ha ha

So, as always, here is a little list of what I used (with links to my website, should you ‘need’ to treat yourself to any of the products so you can recreate this card)

This project is a little time consuming, but the results are so worth it!

To begin, I dabbed some of the Distress Paint onto my lovely Sentimentally Yours blending mat (did you know that I have 2 blending mats, one for each stamping mat and they are designed to fit perfectly!) and picked up very little paint onto the tip of my paint brush (any brush will do, but  prefer the longer bristled ones) and then, with a sweeping motion, brushed a little onto the card, repeating the process until you have as much or as little colour as you like,.. I then repeated this with the second colour, just overlapping the first colour.

I love the dry brushed effect, it gives some fab ‘scratchy’ texture that is harder to acheive with ink pads.

I then used my Doodle Hearts stencil and dry brushed some random areas (you can stipple through the stencil if you wish)

Then I used my distress paint dabber to apply paint directly onto my cracked and splattered stamp and just stamped small areas in the background (it adds a little depth and more texture)(I adore this stamp – so useful!)

TOP TIP – Leave all the paint that’s left over on your mat, we’ll be using it all up for the flowers!

Now, the fun part, spritz water onto the paint that’s left on your mat (I tried to keep my two colours seperate so it didn’t mix the colour), I dipped my flowers, face down, into the lighter colour (giving it a good covering), then dunked the flower onto the darker colour (making sure it was all patchy and blotchy!)(trust me – It looks amazing when dried)

(I saved some smaller flowers in plain white)

I’m a great believer in leaving things to dry naturally, but, if you have no patience, you can force dry your flowers with a heat tool.

I then shaped my flowers as you see in the photo’s.

If you have a go at this card, you’ll notice that the paints make the flowers feel chalky and slightly textured (I absolutely love this!!) They all (no matter what colours you use) look really ‘shabby chic’ 🙂

The centre of my flowers is the amazing Pearl PVA Glue (we now call it 3D Pearl Accents!) and one of the benefits of my extensive colour range is that there is sure to be one of my colours that co-ordinates with the distress colours.. (I’ve listed the colours I used on the shopping list at the start of my post)

TOP TIP – The Cosmic Shimmer Glitter Jewels and Diamond Frost Glitters are amazing over the top of the pearl pva glue (doesn’t change the colour of the glue, but gives it some sparkle)

Below are 3 (yep, loved it that much) cards that I made, 2 portrait and 1 landscape, to show you how they look)

As it’s my first post of 2018, I am going to give the first one (Mustard Seed & Spiced Marmalade) card away!

Just make sure you are a follower of my Blog and leave me a comment on here and I will choose a name randomly from the comments on Sunday 21st January (prob in the evening).. good luck!

Happy Crafting!

Phill Signature 2

3
Weatherd Wood/Vintage Photo

2
Spiced Marmalade/Mustard Seed

1
Bundled Sage/Dusty Concord


I hope you like these cards and have a go yourself, the Distress Paints are amazing and so many techniques you can do with them!

Have fun

xx

Industrial Chic – Gilding Polish, Texture Paste and Pixie Powders

Hello crafters!

Here is a card made at our regular card-making classes.  All the featured cards have been made by the lovely people who come to our classes. 🙂

This card was made using Sue Wilson Industrial Chic Dies, Gilding Polishes and Texture Paste sprinkled with Pixie Powders.  It also uses Phill’s Timeless Stamp collection and A5 Stencils to co-ordinate with the masculine, industrial theme.

We gave our lovely crafters the choice of making a standard opening card or a twisted easel card, so we have included examples of each for you in the gallery.

Stage 1 – Cut out all the layers and die cuts needed as below:

  • Card Blank – 17cm x 17cm
  • Easel Back Card – 17cm x 17cm (you don’t need this layer if you’re making a standard card)
  • Layer 1 – 16cm x 16cm – Gilding Polish layer
  • Layer 2 – 15cm x 15cm – Texture Paste layer
  • Layer 3 – 13cm x 7cm – Gilding Polish layer
  • Layer 4 – 12.5cm x 6.5cm – Stamped layer (Timeless)
  • Easel Base Layer – 16.5cm x 16.5cm – Embossed with Fine Finials embossing folder (if making a standard card, use this for the inside of the card if you wish)
  • Die Cuts:
    • Sue Wilson Industrial Chic Frame & Tag Die
    • Sue Wilson Industrial Chic Mixed Essentials Die (choose any selection you wish)

Stage 2 – Using the smallest square layer (15cm x 15cm), choose your colour of Texture Paste in either Sparkle or Pearl and whichever Stencil you like.  Apply the texture paste with a spatula evenly through the Stencil, putting any excess back in the pot.

TIP -Remember to use long strokes when applying texture paste and try to apply in the same direction (i.e. up/down).  As Phill would say ‘you’re not buttering bread’! 🙂 .

Choose one, two or three Pixie Powders to compliment your colour and tap over the wet texture paste.  You can apply the Pixie Powders with the Stencil still in place or after you remove it; it’s personal preference, but I keep the stencil on.   Leave to dry fully.  ( 30 mins to 1 hour depending on air temperature)

Our crafter has used the ‘Grunge Dots’ A5 Stencil with Decadent Teal Sparkle Texture Paste and Pixie Powders in just Copper. (left image)

The right image is made with ‘Grunge Dots’  and Frosted Sky Pearl Texture Paste with Pixie Powders in Copper, Bronze and Midnight Blue.

Stage 3 – Choose your Gilding Polish Colours and apply to the appropriate layers and die cuts where you wish.  Using two Gilding Polishes enables you to create that ‘grungy’ look.  We used our finger to create the softer, distressed look with our second colour.

TIP- If you’re making the easel card version be sure to use the smallest die from the Frame & Tag Die Set as this makes the stopper for the base card.

Here our crafter has used ‘Mint’ and Copper Shine’ Gilding Polishes and I love it!

Stage 4 – Stamp the background layer and your sentiment using the ‘Timeless Stamp Collection.  Here our crafter has used two Distress Oxide Colours (Peacock Feathers and Walnut Stain)  to create that co-ordinated look.

Image 6

Stage 5 – Assemble all the layers using foam tape where you wish, but definitely on the Frame & Tag topper to add dimension.

TIP – If making the twisted easel card remember to include the easel back card layer so it can stand up! At this point it will be flat card as we need to add it to the easel!

Apply the embossed layer to the inside/base of the card.

image 7

Making the Twisted Easel – to make the twisted easel place the card blank so the card opens upwards as in the photo below.  Take the top left corner and fold over to meet the right middle corner. Crease the fold really well.  This creates the stand for your Easel Back Card.

Apply glue generously to the front of the folded over piece and stick down your main card layer so it faces you.

TIP – I always keep the card blank facing this way, so that I know I am sticking it down right!

Now you have to place the stopper die cut piece on the base layer, so that your easel actually stand up!  As a general rule I place the stopper half way or a little higher.

The Full Cards

Here’s what we used with links to the website…

We hope you enjoy making this card!

Signature!


Festive Stencils, Texture Paste & Pixie Powders!

Hello Everyone

Now this is just plain ole crazy, right? Two Blog posts on the same day! ha ha

I don’t know if you have seen my new Festive stencils or not, but I absolutely love them! They sold out in about 20 minutes when I had them on Hochanda as part of the Creative Expressions takeover weekend, so I didn’t really get to demo them properly!

They’ve been so popular (and thank you for that!) that I cannot keep stock in either my Nottingham or Sheffield shops for too long, which means you are loving them as much as I do 🙂

I wanted to show you this card, created in two ways, but with the same stencil, Christmas Ornaments,

This first card, let’s call it the red and green one, was created using clear texture paste, with a sprinkle of Lava Red and Emerald Green Pixie Powders, then just a little sprinkle of the fab Diamond Frost (Frosty Dawn option) glitter.

If you haven’t used texture paste before, it’s really easy, just spread through the stencil with a spatula (like spreading butter on toast!) remembering to cover the areas you don’t want paste to go through with Scotch Removable Tape (only one I will use, it doesn’t tear your card!)

Hopefully you can see how clear the baubles are and, perhaps more impressive, how clear the actual sentiment stencil is too (this is a big thing for me, shows hte great quality of these stencils!)

The second card, we’ll call this the Gold and Silver one, was created with my New Gold and Platinum Sparkle Texture Pastes and then a sprinkle of Iced Snow Glitter Jewels to give even more sparkle!

*In both cases* I apply the paste, then remove the stencil before adding anything (pixies/glitter etc)

The sparkle texture pastes are a great way to get used to the technique as they are a little thicker, so a lot more forgiving (less chance of seeping under the stencil)

To recreate these cards, here is a little list of what I used (with links to my website, should you ‘need’ to treat yourself to any of the products.)

Anyhoo, I’ve rattled on long enough! Here are the cards…

Hope you like them, I really love DL sized cards at the moment and the Stencils are great for this size too!

Have a go,.. easy to do and beautiful result, whichever products you use.. 🙂

Happy Crafting!

Phill Signature 2